Not finding what you're looking for?
Contact UsWebhook Setup
How ToWebhooks let you send Messijo notification alerts to any HTTP endpoint. This is how you integrate with custom systems, automation platforms (Zapier, Make), or your own backend services.
Prerequisites
- An HTTP endpoint that can receive POST requests
- A Messijo account with at least one keyword configured
Step 1: Open the Notifications page
Go to your dashboard and click Notifications in the header navigation.

Step 2: Add a webhook
Click the add action and select Webhook.
Step 3: Configure the webhook
Fill in the following fields:
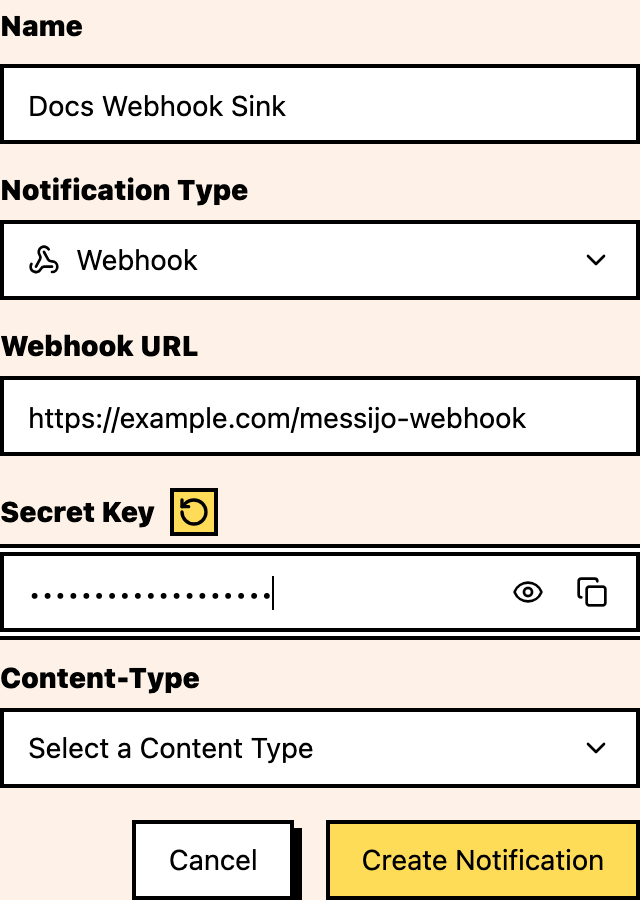
Webhook URL
The full URL of your endpoint. This must be a publicly accessible HTTPS URL.
https://your-app.com/api/messijo-webhookContent type
Select the content type for the POST body:
- application/json: JSON body (recommended for most integrations)
- application/x-www-form-urlencoded: form-encoded body (for simpler endpoints)
Secret (optional but recommended)
A shared secret used to validate that the request is genuinely from Messijo:
- Enter a secret string (any random string)
- Messijo includes this secret in the
X-Messijo-Signatureheader of every webhook request - Your endpoint should verify this header matches your expected secret before processing the request
Why use a secret? Without one, anyone who knows your webhook URL could send fake notifications. The secret ensures only Messijo can trigger your endpoint.
Step 4: Save and validate
- Click Save to create the webhook channel
- Return to the webhook notification card
- Use Validate Webhook
- Check your endpoint logs to confirm it handled the validation requests
Webhook payload
When a keyword match triggers a notification, Messijo sends a POST request to your endpoint with a JSON body containing the event details, keyword, platform, author, content, and optional Lens results. For the complete payload schema, HTTP headers, content type options, signature validation code, and retry behavior, see the Webhook Payload Reference.
Step 5: Assign keywords
- Go to Keywords
- Open the keyword card settings and choose Notifications
- Select your webhook channel in the dialog
- Save
Troubleshooting
No requests received
- Verify the URL is correct and publicly accessible (not localhost)
- Check that your endpoint accepts POST requests
- Verify HTTPS is properly configured
- Use Validate Webhook from the webhook notification card
- Check firewall/security group rules
Request fails with timeout
- Your endpoint is taking too long to respond (over 10 seconds)
- Move long processing to a background queue
- Return 200 immediately and process asynchronously
Wrong content type
- Make sure the content type matches what your endpoint expects
- Switch between JSON and form-encoded if parsing fails
Where to go next
- Notification routing: route different keywords to different webhooks
- Connecting Slack: set up Slack as an alternative
- Connecting Discord: set up Discord as an alternative
- Webhook Payload Reference: complete payload schema and retry behavior